
- Get link
- X
- Other Apps
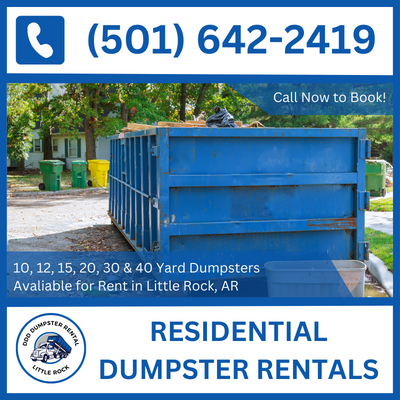
The Complete Handbook for Hassle-Free Home Cleanouts with a Residential Dumpster Rental
Taking on a major home renovation or seasonal clean-out in your property can be an exciting yet daunting task. Between sorting decades of accumulated possessions and disposing of construction debris, the waste generated can be overwhelming.
This is where renting a residential dumpster comes in handy! Dumpster rentals offer homeowners a convenient and hassle-free solution for large-scale cleanup projects, with benefits including:
- Efficient debris disposal: No more hauling bags of waste to your car or making endless trips to the landfill. Dumpsters provide space to collect all waste in one centralized spot.
- Compliant waste management: Properly disposed materials support environmental regulations. Dumpster providers guide you on rules.
- Enhanced safety: Reduce risk of injuries from debris and tripping hazards by containing waste.
- Time and cost savings: Save hours of disposal runs and gas money with a rental.
This comprehensive guide will equip you with everything needed for an optimal dumpster rental experience, allowing you to focus your efforts on the project itself.
We'll cover topics like:
- Determining the ideal dumpster size and rental duration
- Preparing your property for dumpster delivery and placement
- Responsible loading, pickup, and waste disposal
- Understanding your local waste regulations
- Saving money on your rental
By the end, you’ll be ready to tackle home projects with an easy, hassle-free residential dumpster rental! Let’s get started.
Determining the Right Dumpster Size and Rental Duration
When prepping for a major home project, choosing the perfect dumpster for your needs is key to an easy, hassle-free experience. I know the options can seem overwhelming at first - trust me, I've been there! But have no fear, we'll break the process down step-by-step so you can take on your renovation or cleanout confidently.
First, let's talk sizes, because yes - dumpsters do come in different shapes and capacities. Your two main options are likely:
- 10 yard
- 20 yard
Generally:
- 10 yards is best suited to smaller home projects - clearing out the garage, storage cleanouts, minor bathroom upgrades, etc. These compact dumpsters still hold a deceivingly large amount of junk!
- 20 yard dumpsters are ideal for more ambitious endeavors - whole home renovations, major landscaping overhauls, the mother of all spring cleans!
When in doubt, I always say go bigger rather than smaller. No one wants to clutter their driveway with overflow debris (ew)! Many companies only charge marginally more for larger dumpster sizes anyway.
Okay, got your size narrowed down? Fabulous! Now let's talk logistics - specifically the rental duration.
Again, this depends on your project scope and needs. But to start:
Rental Duration
- 1 week
- 2 weeks
- 4 weeks
Most standard demolition or small renovations take 1-2 weeks. Bigger overhauls may need a month's rent.
Things to consider:
- How quickly will you load the dumpster? Don't pay for 2 weeks if you'll fill it in 3 days.
- Schedule buffer days for bad weather or delays.
- Renting longer often gets cheaper weekly rates - score!
See, not so bad right? With the right dumpster size and rental plan secured, you'll be primed for home project success! The debris demons don't stand a chance 😉.
Preparing for Your Dumpster Delivery
You did it - you booked your dumpster rental for your upcoming reno adventure! Give yourself a pat on the back. Now comes the fun part: preparing for that glorious debris-containing vessel to arrive on your doorstep.
Having your property dumpster-ready will make delivery and placement a total breeze. Nothing worse than a jammed up driveway or cluttered site grinding things to a halt! Avoid the drama with a few simple preps:
- Ensure the drop-off area and path to it are clear and accessible. We're talking at least 12 ft wide x 15 ft high clearance. Move vehicles, trim trees back, and tidy up the route they'll take. Safety first!
- For driveway placement, reinforce the spot with plywood or a gravel base if needed. We want to keep surfaces protected, right?
- If planning curbside parking permit placement (very handy), give your municipality a heads up. Never hurts to re-confirm!
- And most importantly - actually BE there when it's delivered! Nothing sadder than a lone dumpster waiting forlornly by itself 🥺. Plan to welcome your new debris-gobbling friend.
See, easy peasy preparation steps! Tackle these in advance and you'll have the confidence of a dumpster rental pro when delivery day rolls around.
If available, ask your provider for a narrowed delivery window too so your exciting new dumpster won't be left unattended for long. Then cue the demo tunes and let the debris fly my friends! You got this.
Dumpster Placement, Loading, and Responsible Use
Woo hoo, delivery day is here! Your gleaming new dumpster has arrived, placed lovingly where you prepped. You're ready to fill 'er up and kick debris to the curb - but not so fast! Proper loading and use is key for optimal dumpster domination. Have no fears, I'm here to walk you through it all.
First up - placement. Work with your delivery team to situate that metal mule safely and accessibly.
Ideal placement:
- Level, reinforced surface away from powerlines
- Not blocking right-of-ways like sidewalks
- Visible but not an eyesore for the 'hood
Remember we prepped clear access routes? Make use of them! Positioning is flexible if something isn't working.
Okay, now for everyone's favorite part - loading! As you demo, haul, clean and sort debris, here are some debris domino dos and don'ts:
- DO distribute weight evenly so nothing collapses
- DON'T toss those dusty boxes willy-nilly! Pack items tightly.
- DO layer heavier items like concrete at the bottom, filling gaps as you go
- DON'T just pile everything towards the front, leaving a useless gap
- DO break down large items to maximize all precious space
See the pattern here? Tetris is our dumpster friend - embrace your inner gamer!
Most importantly - be a responsible dumpster devotee by never tossing prohibited items like:
- Chemicals, explosives, asbestos, etc (so dangerous!)
- Building materials like drywall (special disposal)
- Mattresses and appliances (often recycled separately)
When in doubt, check with your provider about restrictions. Safety first!
Stick to those debris commandments and your dumpster will serve you well. Now get loading! Just holler if any other usage questions pop up.
Waste Disposal Regulations
I know talking rules and regulations doesn't exactly scream fun Friday night. But when it comes to handling waste, staying compliant isn't just important - it keeps our communities and environment safe too! Let me break down the key regulations to keep those dumpster good times rollin'.
First, the basics:
Nearly all counties, cities, and towns have established guidelines on debris disposal. Common ones include:
- Special permitting for placing dumpsters on streets, curbsides or alleyways
- Restricting certain materials from disposal like tires, appliances containing Freon, and construction debris
- Requiring covering loads with tarps to prevent spillage and litter
- Limiting noise from loading/unloading during evening hours as a courtesy
- Enforcing weight limits so trucks aren't overloaded
Seems like a lot right? Lucky for you, your dumpster rental company handles compliance across the board so YOU don’t have to remember all these pesky details. But being aware of the rules can help avoid violations or extra charges.
For example if Brad here fills his dumpster with 600 lbs of prohibited brick without telling anyone? Bad news Brad. But we're smarter than that!
When it doubt, ask questions like:
- What materials do you restrict from dumpster disposal?
- What are your requirements for curbside placement permits?
- What are your policies around noise, debris spillage, and overloading?
- What if my project needs special exceptions made?
Reputable companies like ours will outline restrictions upfront and guide you every step of the way. That's customer service baby!
Together we can keep your home project on budget AND uphold community standards around safe and sustainable disposal. High five for being an environmentally-conscious dumpster champ!
Managing Dumpster Rental Costs
I get it, budgeting for home projects can be tricky. You’ve already dropped a chunk of change on supplies and contractors. Every penny counts! The good news? There are tons of ways to save money on your dumpster rental too. Let’s talk about creative cost cutting, shall we?
First, take advantage of flexible sizing and scheduling:
- Start with the smallest size you can feasibly get away with
- Extend/reduce rental period based on realistic loading time
- Take advantage of cheaper weekly and monthly rental rates
Little tweaks make a difference. For my patio re-tiling, I calculated 15 cleanup days max. Went with a 20 yarder for 3 weeks and saved 17% over 2 weeks! Can I get a heck yeah?
You can also:
- Ask about price matching policies or discounts for repeat customers
- Inquire if they offer special rates for neighbors sharing a dumpster
- See if they’ll subtract delivery/removal fees if you help load the truck
Finally, beware the dreaded change order fees! Nothing busts budgets faster than surprise overage charges from stuff like:
- Overstuffing and overweight dumpsters
- Needlessly throwing away recyclables metal/wood
- Letting rainwater accumulate
Carefully loading, covering your dumpster, and asking tons of questions makes so much difference. We want to keep those wallet woes away! Together we can tackle your project on-budget. Just holler if any other cost questions pop up!
After Your Dumpster Pickup
The demolition dust has settled. Your gleaming, emptied dumpster heads off into the sunset (aka the truck). As you gaze around at your newfound space, it hits you - this puppy is far from over! Don't worry, I have a few final tips to wrap up your rental experience nicely.
First up, inspect the site thoroughly once the dumpster is removed. Make sure no debris gets left behind during loading or removal. Even little shards of glass or nails can be safety hazards! It's also easier to patch up any property damage like cracked driveways when materials are still on hand, rather than once your project wraps.
Speaking of - provide prompt feedback to your provider on anything that needs attention - damaged driveways, difficulty accessing streets, troublesome pickup, etc. Reputable companies rely on customer input to continuously improve. Don't be shy!
Finally, don't neglect post-project waste sorting and disposal! Recycle those leftover wood beams, metal bits, and anything eligible in your local curbside bins. Safely contain and label partly-used chemical containers for proper hazardous disposal too.
See? A few quick to-dos make for smooth dumpster rental sailing from start to finish. Then you can sit back and admire your newly revamped, debris-free property with a cold beverage in hand. Cheers to a job well done!
In Closing...
And there you have it - everything you need to tackle your next home project with the ease and convenience of a residential dumpster rental!
By now you should feel ready to:
- Determine the ideal dumpster size, rental duration, delivery placement and loading
- Prepare your property pre-delivery
- Use your dumpster responsibly and safely
- Uphold local waste regulations
- Save money on convenient debris removal
With the right dumpster partner, supplier guidance, and debris removal plan, you can take on attic clear-outs, home renovations, construction/demolition waste and more with total confidence. Here's to a smooth, cost-effective, and environmentally-friendly dumpster rental experience from start to finish!
Comments
Post a Comment